Renegade Jammer is a 3D speed-based platformer developed in Unreal Engine 5.4. This project was part of my final master’s degree project, spanned two years, taking the team from zero engine knowledge to a shipped product. It was created in collaboration with Team Kaulu, an academic studio formed during the course alongside 5 other team members.
I was responsible for:
- Designed and programmed core gameplay mechanics
- Led the technical development and technical team coordination, managing version control and scope
- Engineered the physics-based movement architecture and controller
- Developed the dynamic camera system to enhance game feel
- Integrated all UI screens and menus
- Created custom tools to streamline the design process
This portfolio entry highlights how I engineered the “feel” of the game. If you want to know more about the development you can check my final degree report (only in Spanish) or directly contact me; I will be open to discuss anything!
Awards
The game was awarded with:
- Best Academic Project at BCN Game Fest. Press note.
- Best Indie Game at Lérez Up, a local event in Pontevedra Press note
Also, we talked about it in local press several times!
Setup
As with almost any programming project, we needed a reliable version control system that allowed us to contribute to the project seamlessly. Given the academic scope, we chose Git + GitHub. For branching, we followed an adapted GitFlow model.
Overall, the stack worked well for us, with binary management and merge conflicts being the main challenges. Since we were a small team working at different levels of the project, conflicts were managed without file locking (Git LFS).
To prevent Git’s learning curve from becoming a problem, I developed an internal guide aimed at less technical collaborators. It covered the basics of Git, troubleshooting, code style, and included a practical example to help team members learn how to collaborate effectively.
You can check our GitHub repository here!.
3Cs: Physics-Based Character Controller
In terms of design, the movement in Renegade Jammer is the core experience. I engineered and designed a custom physics-based controller to achieve a specific “floaty but responsive” hoverboard feel. I moved away from the standard CharacterMovementComponent to build a system that relied on forces and torques, giving me complete control over the handling and inertia.
My approach to the system was a simple vehicle raycast suspension, with a loose suspension trying to give the hoverboard a “inherent bounce”. I tried to prevent overriding transform (position and rotation) by code and let the physics engine run all the movement simulation through forces applied to the body and some constraints.
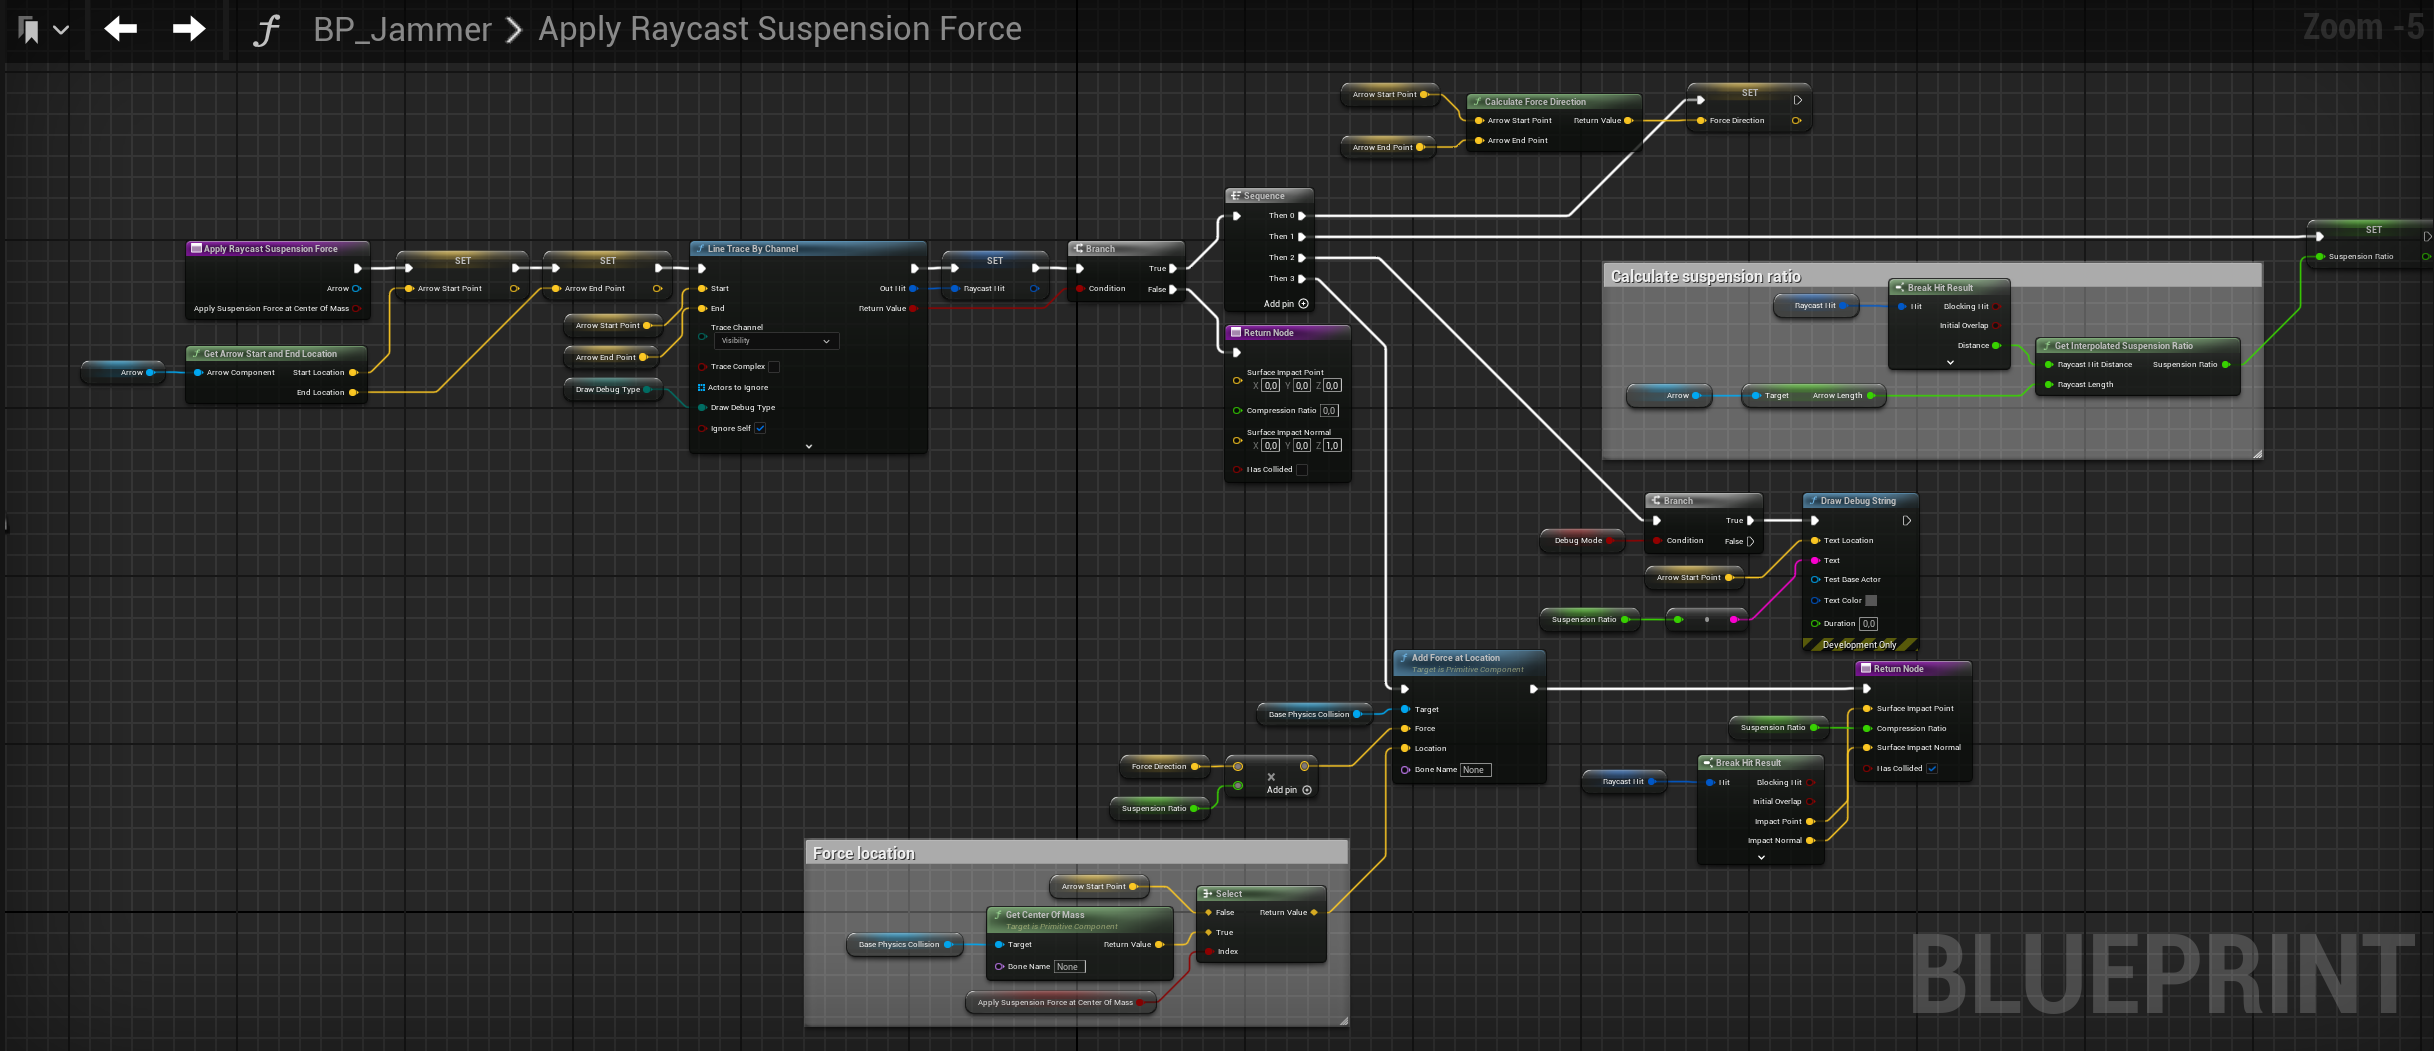 Core suspension logic: A custom physics implementation using raycasts to calculate compression ratios and apply upward force. Includes built-in debug visualization (toggled via
 DebugMode) to assist artists and designers in tuning vehicle handling.
A significant part of development involved fine-tuning the simulation parameters to ensure the movement felt right and aligned with our design principles and desired gameplay experience. Once we had a playable version, we used every event we attended as an opportunity for playtesting and gathering feedback.
From a technical perspective, one of the biggest challenges I faced was tunneling, which became critical since maintaining stability and performance is essential in a competitive racing game. At low frame rates, players could sometimes break through walls or other map elements. To address this, I adjusted Unreal’s substepping parameters, improving simulation determinism by reducing integration error. Additionally, we enabled continuous collision detection for the main collision components. The final configuration ensured that the physics simulation ran at a minimum of 60 updates per second, even when the game dropped to 20 FPS.
An essential part of the game’s overall feel was the Dynamic Camera System. I focused on minimizing motion sickness while enhancing the sensation of speed. I developed a custom actor component that dynamically interpolated parameters—FOV, pivot lag, camera shake…—based on the hoverboard’s velocity and state (e.g., boosting, jumping, falling…).
By testing the game, we found players were compiting for the highest score in the events so we added a online leaderboard to the game, adjusted the gameplay to focus on a mix of speed and precision and helped us to make the vision of the game clear. ___
Performance
Performance in this project was conceived as a long-term run not a phase of production. We believed that treating performance as a separate phase would have left us with less time to polish other systems, and waiting until the last minute to think about optimization would have pushed us toward quick fixes rather than scalable solutions.
To avoid that, we challenged ourselves within the technical department to follow some mandatory rules and practices such as avoiding ticking, distance culling, uses of LODs, and so on. We also focused on iterating on solution designs until we found scalable approaches. We measured performance on the lowest-spec PC available after every product increment and ensuring we consistently met the 60 FPS target.
We used Unreal Insights to perform these measurements. Whenever the game failed to meet the target framerate (or when a new feature caused a significant performance drop) we iterated on our solutions before continuing with production.
Here, in the second point in the technical document, you can take a look at the rules defined about performance!
Animations Integration
Working on animation was a real challenge, as the visuals had to feel as dynamic as the movement itself. I collaborated closely with Manuel Sanjurjo, our 3D artist, animator, and producer. He handled the animation and rigging, and together we iterated and fine-tuned the results until we achieved the desired quality.
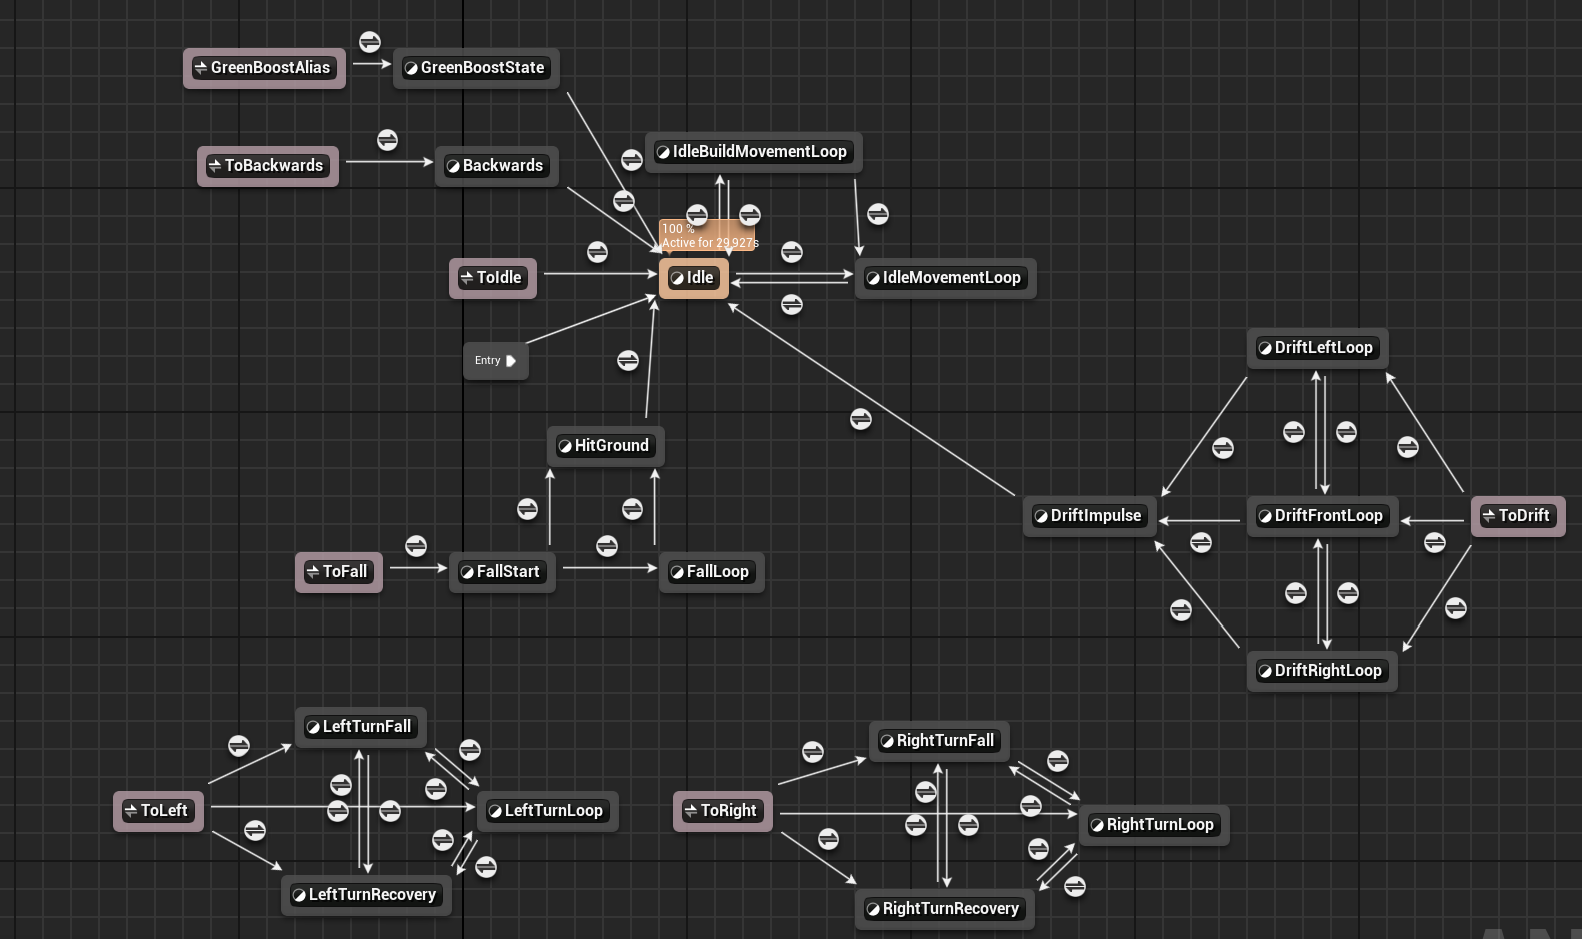
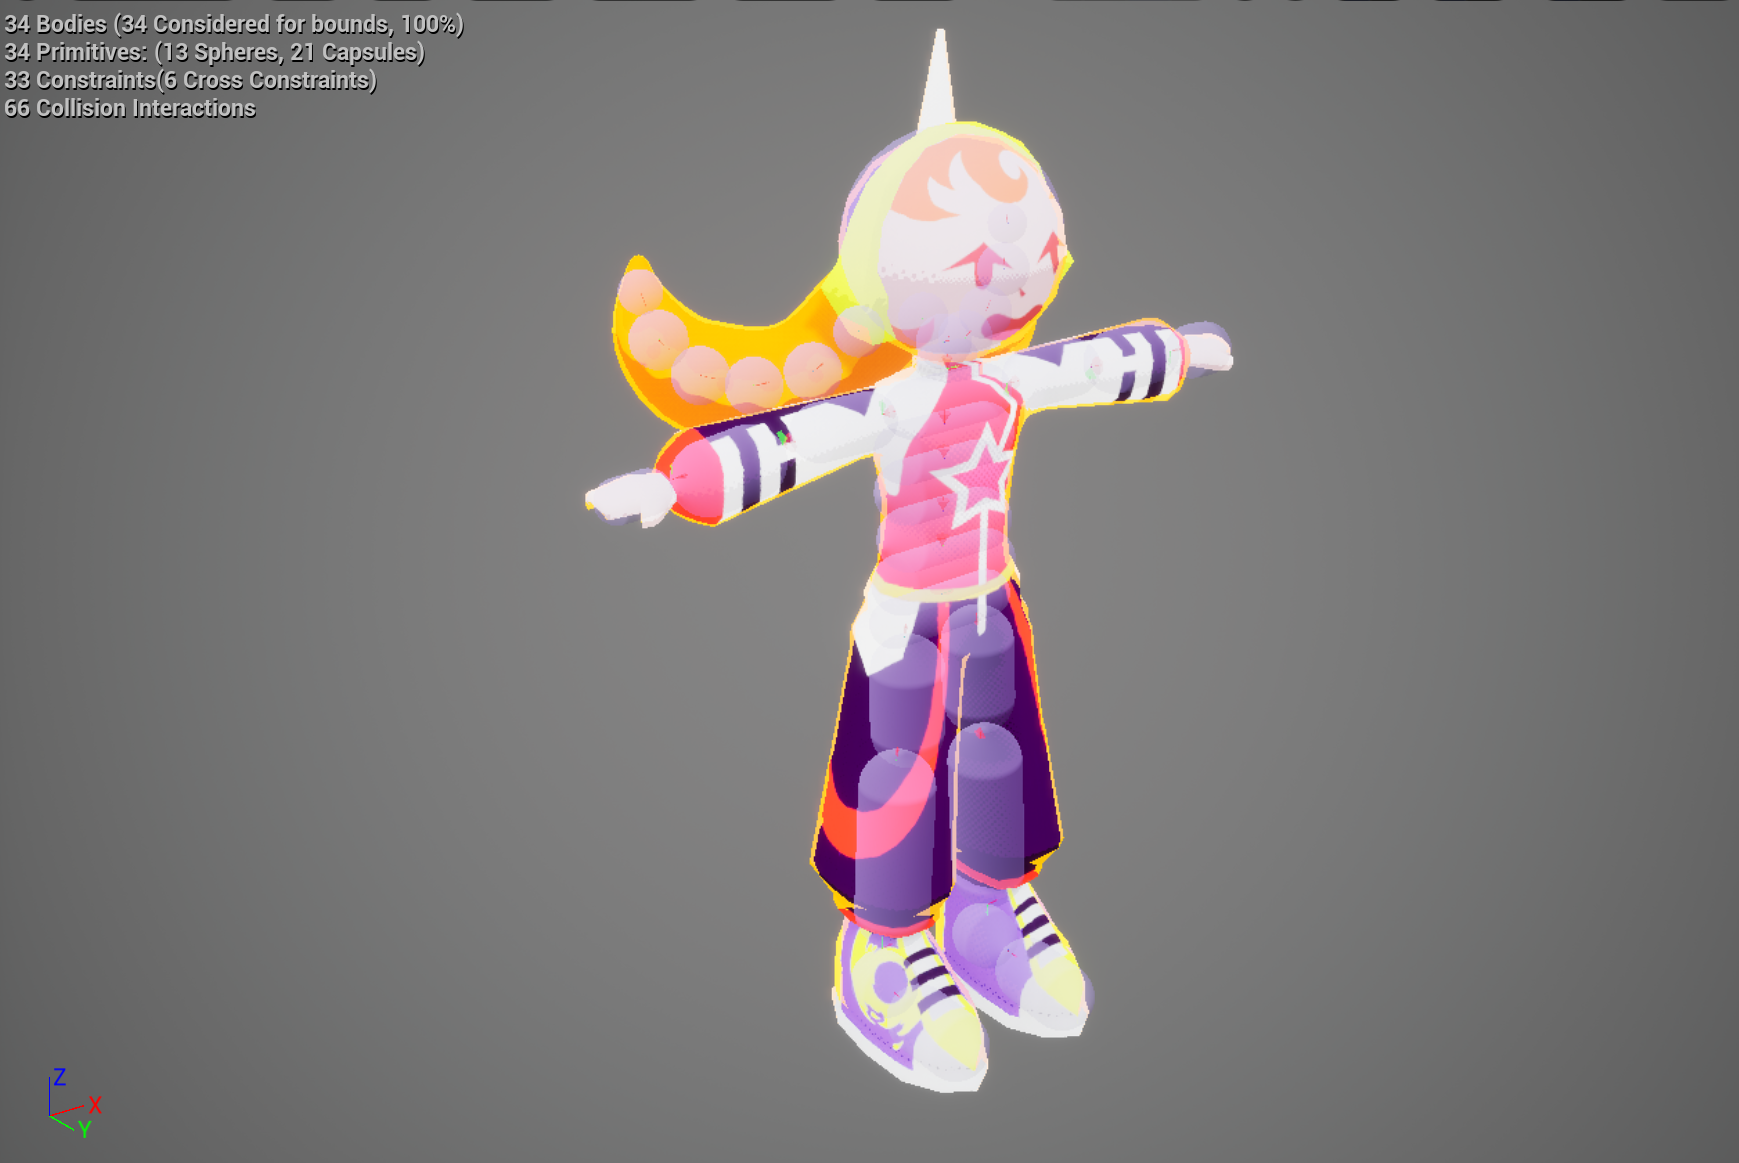
The animations were implemented using a complex state machine, ensuring smooth transitions and responsiveness. Additionally, I developed an Unreal Physics Asset to enable ragdoll effects and simulate Jammer’s hair physics, enhancing the overall sense of movement and realism.
UI Programming
The user interface was a collaborative effort with the art department, with Andrea Alonso serving as the UI designer. It was implemented and animated using Unreal Engine’s UMG (Widget Blueprint) and custom materials. The biggest challenge I faced was ensuring seamless navigation with both controller and mouse across all screens.
VFX
I developed most of the VFX used in the game. Every effect was implemented to address a specific design requirement, and VFX played a crucial role in improving gameplay feedback and player guidance. All effects were created using Unreal’s Niagara systems with custom materials and were fine-tuned in collaboration with the art department — even though I’m not an artist.
A standout case was the object light beam and background shown in the video below. At a certain point in the project, our design team realized that important objects were not standing out enough from the background. To address this, I developed a dynamic light beam that adjusted automatically based on the camera’s distance to the object, helping to visually highlight key elements. Playtesting sessions validated the solution, showing a significant improvement in player guidance and in following the intended golden path. Through this task, I learned about the importance of performance in VFX, the limitations of transparency (since all transparencies are dithered), distance culling, and render passes.
Tool programming: Platform generator
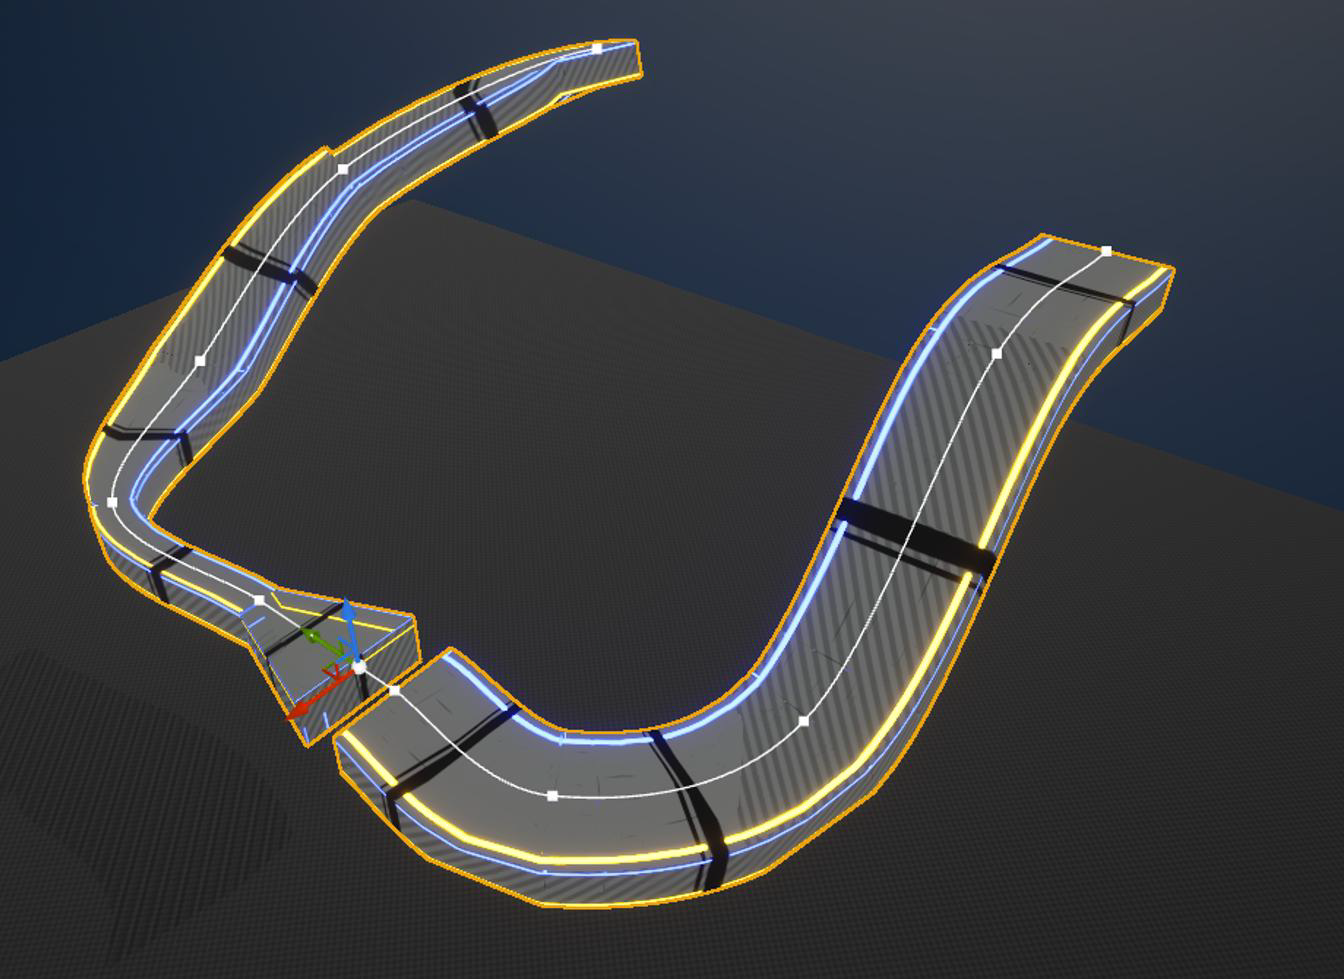
At the beginning of the development process, we developed platforms manually, modeling each type of platform to later import them into the game. This was a time-consuming process and it limited us to use a small amount of platforms. Since we were in a phase where we were iterating a lot, I decided to build a tool to generate platforms automatically and to be able to shape any platform we could imagine.
I developed a tool to generate platforms using a blueprint-based approach based on a simple Unreal’s mesh splines. The tool allowed for the creation of platforms with different shapes and sizes, and it was used to generate platforms in the last developed zone of the demo level and the tutorial.
I avoided reinventing the wheel but I used the opportunity to learn about tools programming and applying in a specific case.
It works by dividing a spline into segments and then creating a platform for each segment. We only needed a few base platforms with sufficient mesh density to be able to adjust the mesh to the current spline.